If you are using iOS 11 or a later version you must have noticed the new HEIC file format of the photos taken with your iPhone camera. It takes time to adapt to new features, so it will take a while for HEIC to go mainstream. The new file format has compatibility issues with some apps or devices, thus forcing people to opt from HEIC to JPG. Here is a guide on how to convert it.
What is a HEIC file?
HEIC originates from Apple’s initial HEIF (High-Efficiency Image File Format). Moving Picture Experts Group (MPEG) developed HEIC as an upgrade to the popular JPG file format.
Let’s look at the improvements the newer file format intends to add to your pictures. A HEIC file is smaller in terms of storage data but still retains its high quality. According to MPEG, HEIC images take up about half of the storage space required by JPG images with similar quality. If you multiply the space saved by thousands of images taken the outcome is outstanding. Don’t you love saving some space to store other files on your device?
While the HEIC file format offers you great benefits, you have to adapt to the fact that popular software and operating systems have not adapted it yet. Furthermore, the format is quite problematic on some apps, devices, or websites. Your only solution is to convert it.
How to convert HEIC to JPG on your Mac
With predominant software and operating systems not adopting HEIC, such images have compatibility issues on certain apps or devices. Most people are having a difficult time trying to adopt the newer HEIC file type.
Are you having trouble adopting the HEIC file format? There is a solution if you want to convert HEIC to JPG using a Mac. Apple’s Photos app does more than just managing your pictures in place. You can also convert the HEIC file to JPG. Here is a guide on how you can convert the HEIC file type using the Photos app on your Mac:
- The first step is to import the HEIC image into your Mac’s Photos app. The other option is dragging the image into the Photos app.
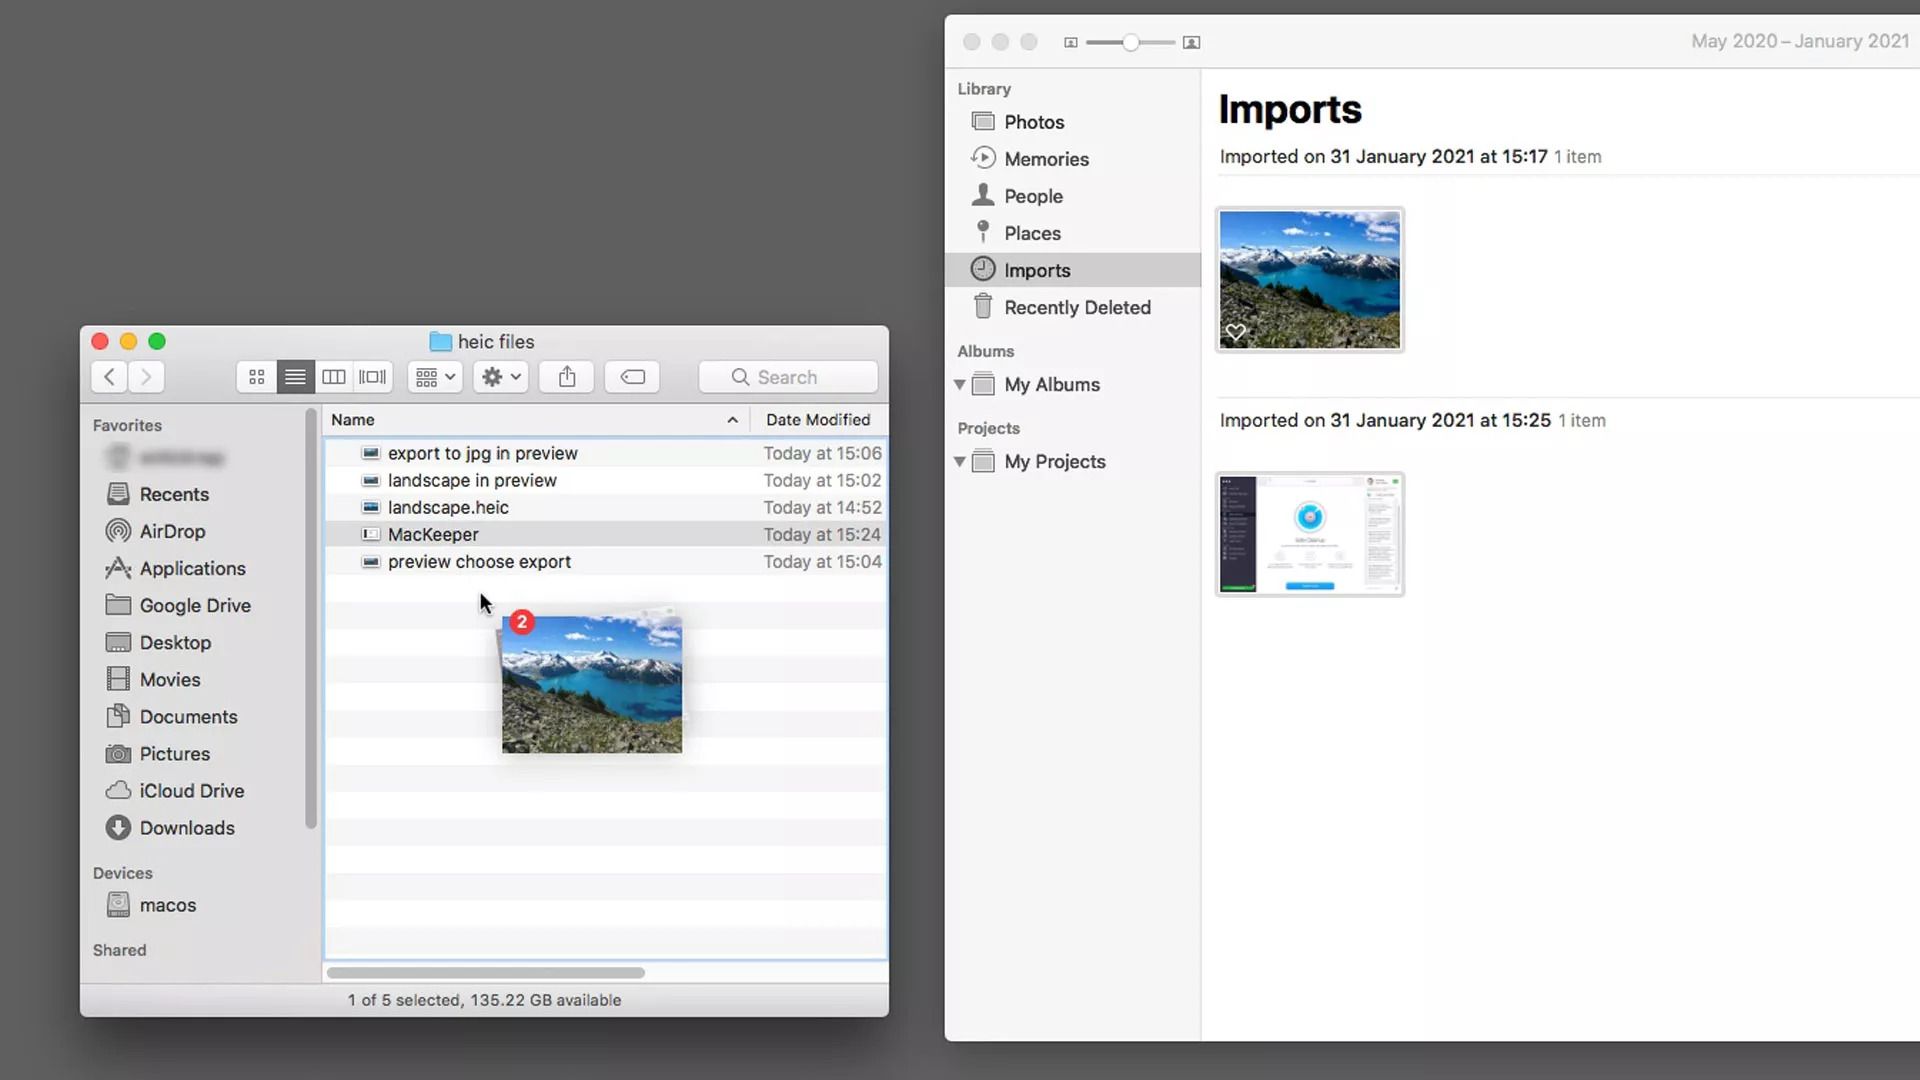
- The next step is selecting the image you intend to convert. Click and drag the image into any Finder window. The conversion to JPG is automatic.
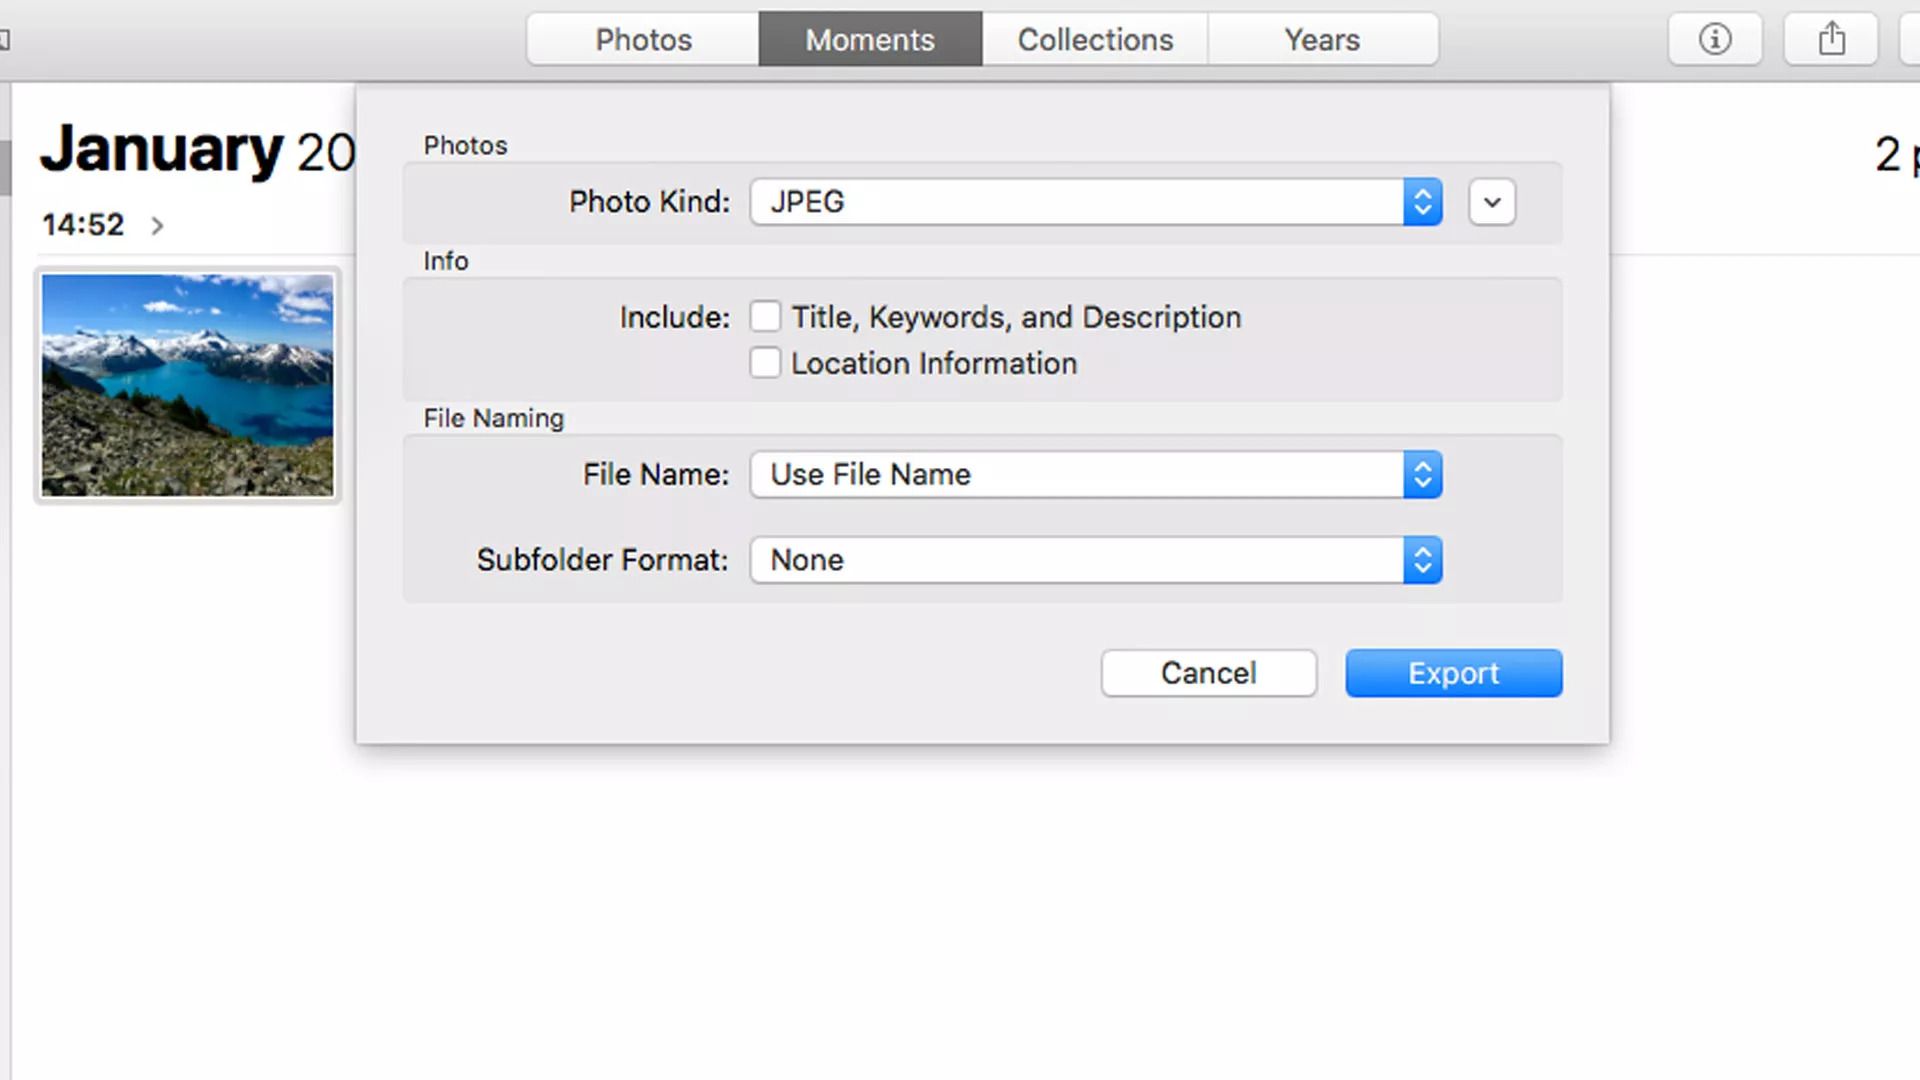
Convert HEIC to JPG with Preview
How often do you need to convert HEIC images to JPG? Are you just looking for an image to upload online as an avatar? Preview is an excellent alternative for occasional conversion of HEIC to JPG for those who do not use Apple’s Photos app – Preview is Mac’s default app for viewing images. There is a lot more you can do with Preview. It does not only display documents and photos but also edit, mark, sign or watermark them. Here is a step-by-step guide on how to convert HEIC to JPG using Preview:
- Open the image in Preview
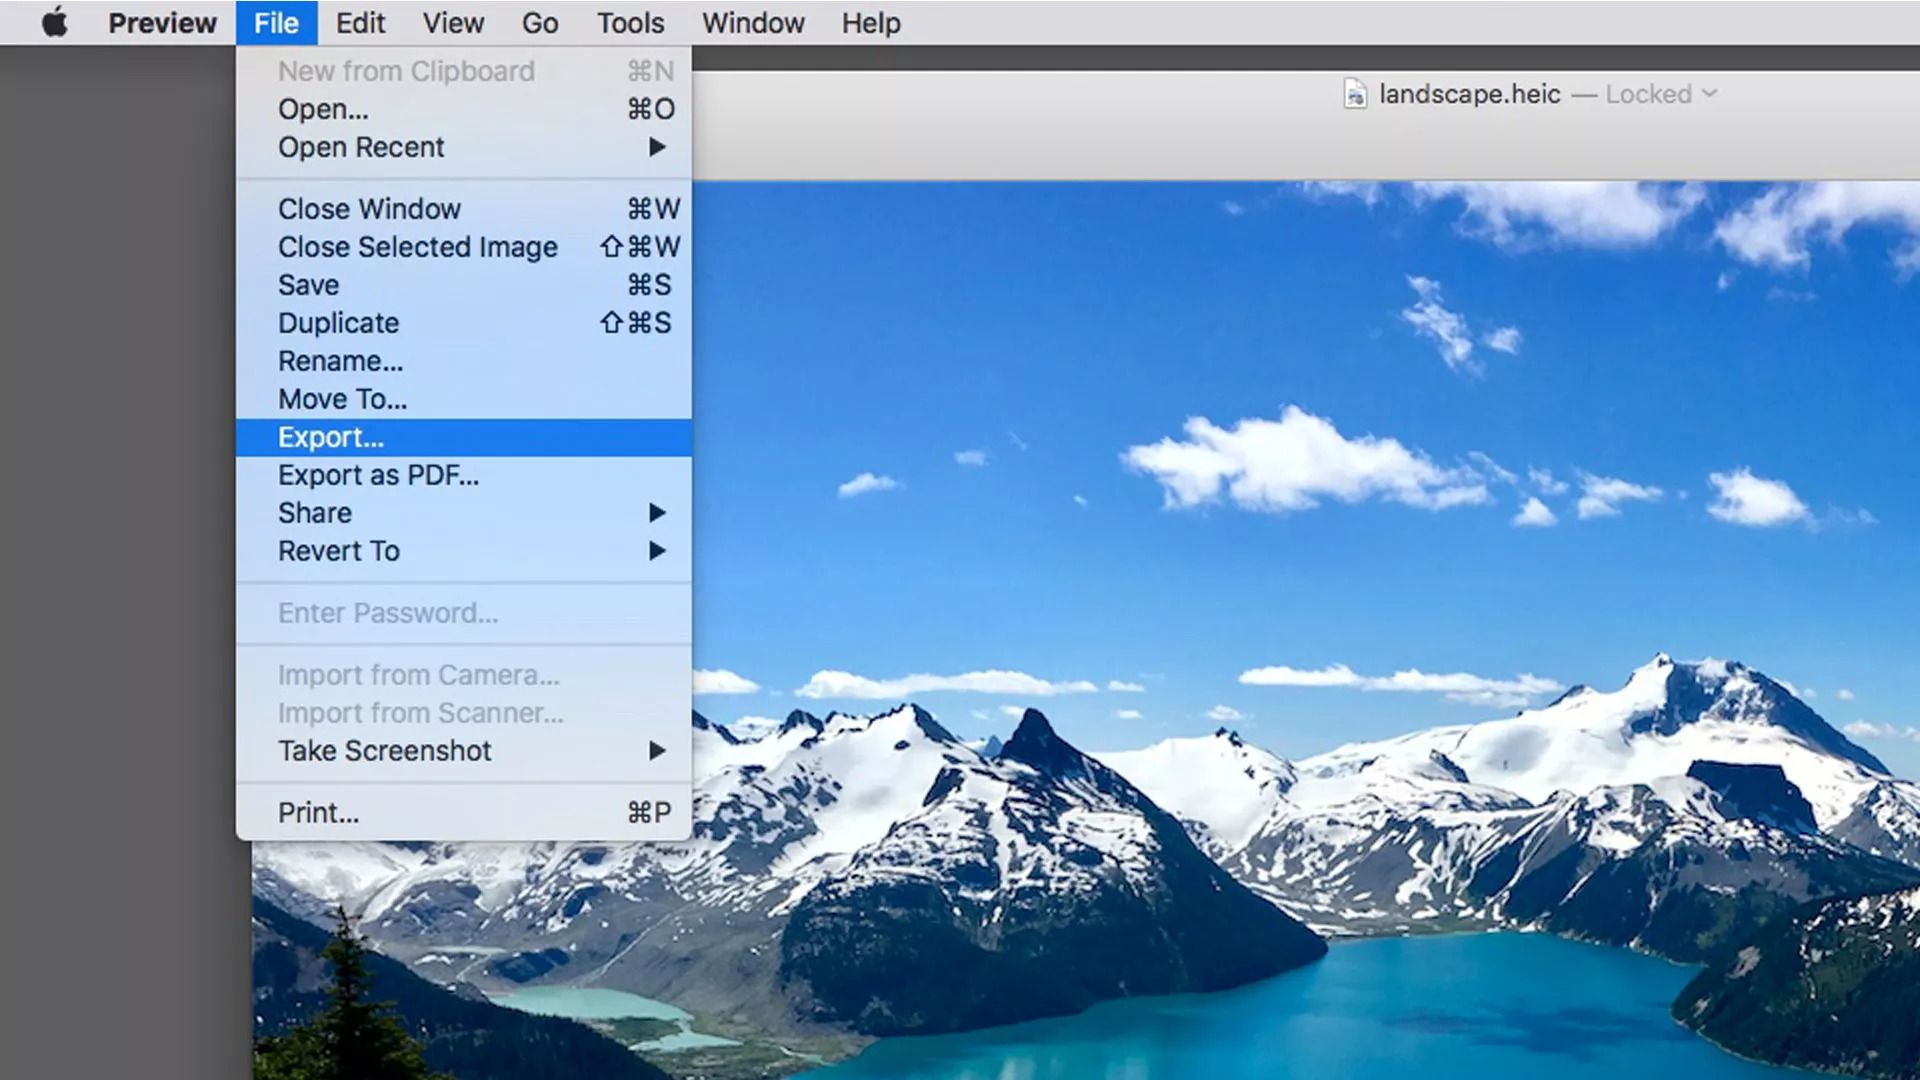
- Click File then Export in the menu bar
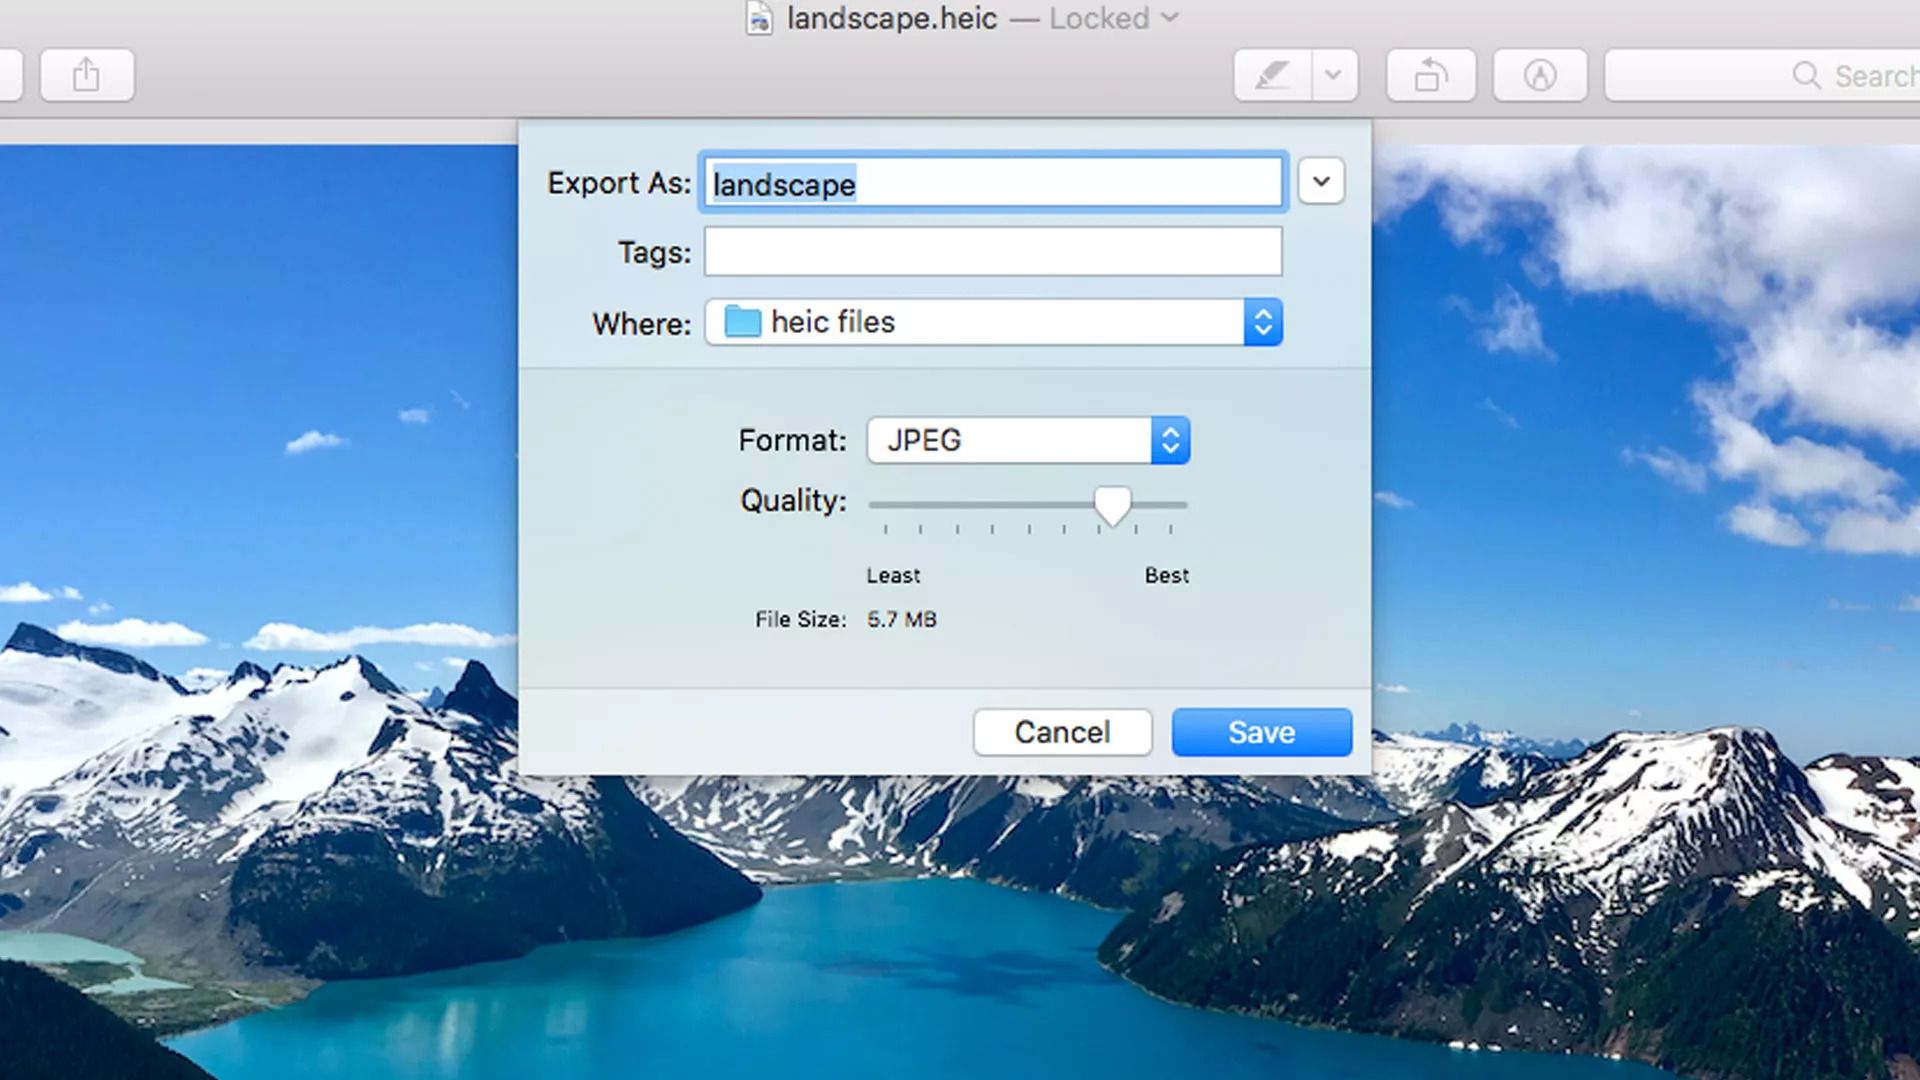
- In the Format drop-down – select JPG and adjust settings as required
- Click Save
How to copy text from HEIC image on Mac
Some people struggle to copy text from an image. You can easily copy text from HEIC images on your Mac using the TextSniper app. Navigating TextSniper is simple, and the text recognition on this app is so fast. Wondering how you can copy text from HEIC images using TextSniper? Here is a step-by-step guide:
- To start, press CMD+Shift+2 or click “Capture Text” from the menu bar
- The app will quickly recognize the text inside the selected image area and copy it to the clipboard
- Press CMD+V to paste the text to the editor, messenger, notes, or any other software
Click the link above to give TextSniper a try. It has a 7-day money-back guarantee in case you are not satisfied with the app!
How to change HEIC to JPG on Mac
There are plenty of third-party apps that can convert an image from HEIC to JPG. One such app is the iMazing HEIC Converter. This HEIC to JPG converter is efficient and simple to use. It also protects your privacy when you convert images on your computer. Uploads to iMazing HEIC Converter do not take long since there is no unknown cloud service. Here is a guide on how to convert HEIC to JPG using the iMazing HEIC Converter:
- The first step is installing the iMazing HEIC Converter on your Mac computer. The app is free.
- Drag and drop the folder or file containing the HEIC image(s) on the iMazing HEIC Converter’s window.
- Click “Convert” and choose a location folder to save the converted images
How to convert HEIC to PNG on your Mac using Photos
Everyone has their preferred file format. If you are having trouble adopting the newer HEIC and JPG does not appeal to you, PNG is also an option. There are several ways to convert HEIC images to PNG. One of the easiest ways to convert HEIC to PNG on your Mac is using the Photos app. The HEIC to PNG process is quite straightforward. The process might be simple, but it is very efficient. Here are the steps to follow during the conversion:
- Open the Photos app and look for the image you want to convert
- Select the image
- Click File > Export > Export Photo
- Choose PNG on the drop-down menu
- Click Export
- Choose location to save the converted image and click Export
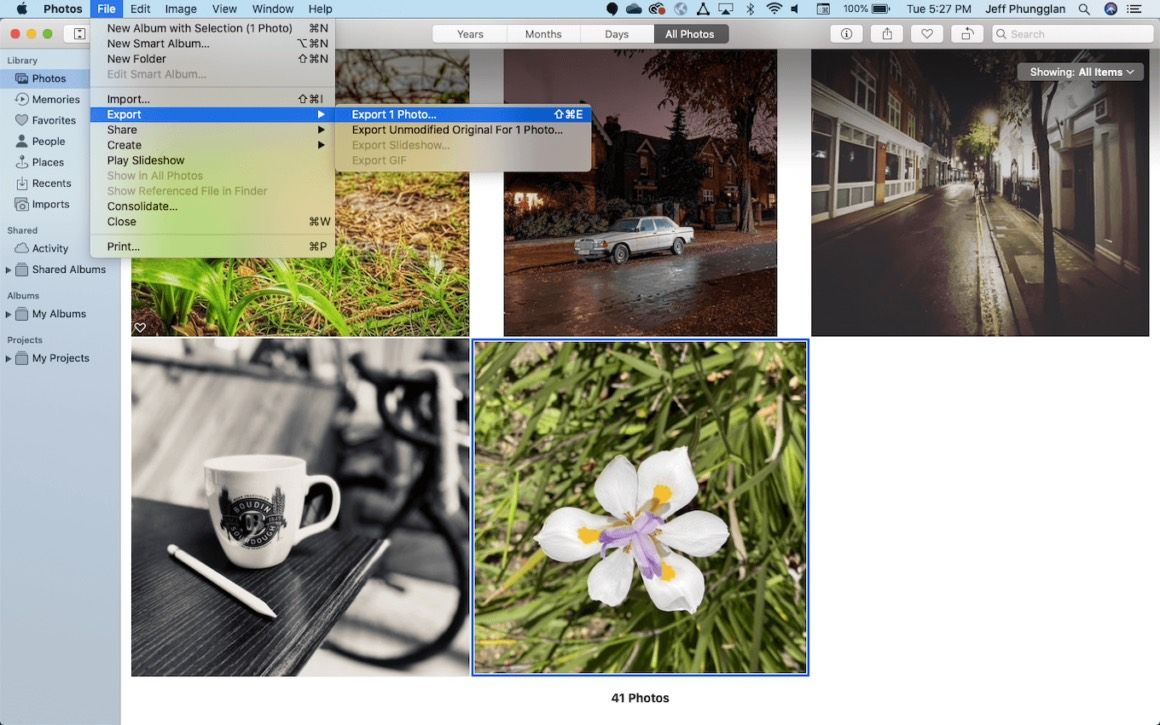
- And just like that, you have your PNG image.
With this guide converting images from one format to another should not be a problem anymore. If you ever need to convert your images, the procedures demonstrated will allow you to do so comfortably. You can either use Apple’s Photos app, Preview, or any third-party converter of your choice.
